Friday, October 31, 2008

Shorter Trainorama C32 Couplers


For those who have larger radius curves the supplied Trainorama C32 class couplers are too long leaving a large gap between the locomotive and the first carriage.

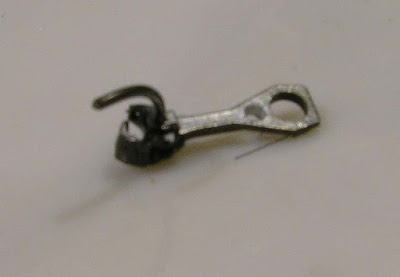
The supplied coupler is a work of art but there is no way it can be shortened so here is how I managed to do it.

Step 1

I found that there was just enough 'meat' ahead of the pivot hole in a long shank KD 156 coupler to drill a No.50 hole for the C32 coupler pivot screw and file the rear and two sides to match the supplied C32 Trainorama coupler.

To drill the hole I first used a scriber to make a centre mark for the drilling. You will have to mark this by eye as it is too small to try to measure and mark it.

Next I used a No.57 drill in a pin vice to drill the first hole then made it progressively larger with a No.55, No.53, No.52, No.51 and finally No.50 drill. It is best to do it this way as the drill can easily bite into the die cast metal and jam.


Step 2

The next step is to carefully cut the rear hole section of the coupler away. I used a jewellers saw to make the first cut into the hole, this then allowed me to use a pair of sharp transistor wire cutters to snip away the rest. The first cut will allow the metal to be cut away without stressing the drilled area.

Finally I used a fine jewelers file to file the remaining curved section of the original pivot hole at the rear of the new hole away until it just disappeared, this formed the rear face of the coupler.

I then filed the two sides to the same slight angle as the sides of the C32 coupler end, also filing the corners with the same slight curve.


Step 3


I now mounted the coupler.

I managed to lose one of the two small coupler mounting screws and guess which screw isn't in the bag of spares!

I think I may just align it and put a tiny spot of glue on the screw hole if Trainorama can't supply a replacement, hopefully they can.

As you can see by the photo above I still hadn't adjusted the droop of the coupler

I found that I had filed the back just a little too much and as a result the coupler doesn't stay centred but will swing back when pushed sideways, so I suggest you go slowly and try a couple of trial fits until you are happy.

Layout Trials

I have successfully pushed and pulled some 72'6" passenger cars around 30" radius curves, up and down 1 in 40 grades. On the inner side of the curve there was about 1mm between the buffer heads.

Now, to do another for the tender and perhaps have another go at the front one.
Well, that's about it, so have a go, it isn't hard at all.

Sunday, October 19, 2008

There was movement at the station ......


For those who have been following this blog I give you something to ponder.

The first picture is of an upper layout level support made from a piece of 1/4" threaded rod. The branches are Woodland Scenics and are glued to the trunk with hot glue. I was going to use 'No More Gaps' a water based flexible crack filler but when I was gluing the branches on I just kept going. It worked fairly well. The tree is part painted with water based house paint from those little sample pots, very useful.

The final photo shows the finished support. The trunk has extra colours added using pastels and the foliage is light green Woodland Scenics foliage.

I will post some more when I move this little project along a bit further.

What I can say is that it will add a another level of operation to the layout, sorry for the pun.

Saturday, October 4, 2008

The Area I Am Modelling


The type of landscape I am trying to create, rolling hills to tree covered sandstone mountains.

The 48 class diesels are from a later period than I am modelling.

Photo by Chris Nelson - with thanks (see comments).

Wednesday, October 1, 2008

PHOTOGRAPHY AND THE SEARCH FOR REALISM IN MODELLING

This is the text from a talk I gave at the 2007 Modelling the Railways of NSW Convention. I present it here to aid those who like me would like take good model photographs and to improve their modelling.
The talk included discussion of camera settings, framing the shot, editing, adding backgrounds and a final adjustments.

A Camera

This discussion will not involve the use of film cameras although the basic principles are the same and they can certainly give equally good results in the right hands. The advantage of the digital camera is of course the ability to review the shot immediately and correct anything required.

I use a Nikon 8700 which is an 8MP digital camera (no longer available), it is about as big and complicated that you can get from Nikon before moving to a DSLR (Digital Single Lens Reflex). It has a fixed lens which goes down to an aperture of f8.0 and has a screen that can be moved in all sorts of directions. The screen allows me to put the camera on/in the layout and see what I want to take to frame the shot.

I bought the Nikon 8700 primarily for the features that allow me to take these model pictures. I always shoot in macro but it just depends how close a lens can focus and a high f stop is best for a bigger depth of field, eg. f22 or greater would be terrific. The Nikon 8700 also has ISO 50 for 'film' speed - I read this as fineness as in grain size of film ???? All I know is that the lower the ISO number the better. This camera also has Noise Reduction which processes the picture to remove the odd pixels that appear as noise. I shoot time exposures with normal room lighting, never with flash. Some pictures are up to 8 second exposure at f8. White balance is important also to get the right colour balance although if shooting in RAW or TIFF modes this can be corrected later in Photoshop or the like - it is better to get it right first time if possible. I often shoot in auto white balance which works well on my Nikon. You will really have to look deep into the specifications and capabilities of each prospective camera.

Digital Single Lens Reflex Cameras

A DSLR would give a much better f stop because you can change the lens to suit to get a better depth of field. The larger the f stop number the deeper depth of field you will have to play with.The disadvantage of a DSLR is that the screen can't be used to take a shot. DSLRs are restricted to using the viewfinder to frame the shot, because of the mirror system housed within the camera. This means that there is an inability to frame the shot and focus from low on the layout or awkward angle shots. All of the DSLR screens I have seen so far are fixed.

If you can find a DSLR with a moveable rear screen then you will be lucky.

I believe that the 7.5MP Olympus E330 has what they call a 'live screen' that allows a more restricted range of movement. The screen would probably be useable but not as flexible as the Nikon 8700 but then I can't change lenses.

I think though a DSLR would be of greater use as it is a better camera overall, more flexible. So it is a toss up as to what to get.

Several new DSLR cameras have what is called 'Live View' which means that you can see on the LCD screen what you are trying to take.

Late Breaking News

There is a new accessory for the DLSR allows viewing through the lens while framing and focusing the shot, it as called the Zigview S2. The manufacturer's web site is : http://www.argraph.com/Zigview/page1/Zigview_page1.htm
but the following web site has the most information I could find : http://www.climaxdigital.com/zigview/zigview_s2.html.
It is not cheap and would be at least $A500.

And

There is a compact digital camera that has virtually all the features of my camera, it is the Canon PowerShot A650 IS, a 12MP camera. I bought one recently for work and I have used it successfully. It has been around for 6 months or so but is still available, do a search on the net and check it out.

Framing the Shot

The movable screen on my Nikon 8700 allows me to place the camera in all sorts of positions on the layout and still be able to see what the camera is seeing and focus accordingly. The lens on my camera is at the bottom of the camera so the centre of the lens is probably about the height of the average HO person.

I try to achieve a photo that you could imagine finding in a book on the prototype.

I always try to shoot looking up to or at a train from ground level, I rarely shoot downwards unless there is some indicator in the foreground showing that you may be standing on something 'real' in the scene. I do not like the classic model train helicopter shot that certainly shows the layout but screams model.

I am always searching for that interesting view, even in scenes that I have shot many times.

Digital Manipulation

I find that you will rarely manage to take that perfect shot straight from the camera, while this may be possible in the real world in modelling there is always something in the background or foreground spoiling the effect.

I use Photoshop to adjust the picture to obtain the maximum realism.

I only use a few of the tools as I believe that you should retain as much of the original shot as possible.

I do often use another layer to place a real background and sky behind the modelling to remove that unsightly brick wall, etc.

I use the 'Magic Wand' tool to collect together all the parts of the background that I don't want. This is done by clicking on the areas you want to remove while holding the Shift key down. All the areas are joined together and are outlined with a dotted line.

When you have collected them all you go to the Select menu and choose Invert, you now have all the picture that you want to retain. Copy this to the clipboard, open a new layer and paste the picture.

Now choose an appropriate background picture and select all and copy it.

Open another new layer and paste the background picture into the layer.

Now order the layers so that the model picture layer is over the real background/sky.

If the background does not work with the model picture either through being the wrong angle, too close, too far or the wrong colouration then try another.

Once you are happy with the combination it is time to do a small bit of work to blend them better.

I usually only use Brightness and Contrast to bring the two pictures to look all part of the one scene.

I will occasionally adjust the colour balance of either or perhaps both layers to better match one to the other.

The best way to deal with the model foreground and real background is to have a range of landscape pictures in varying light conditions.

It really comes down to choosing the right background.

I take landscape pictures whenever I have the opportunity and have them with blue skies through to grey and overcast.

To remove the front edge of the layout if it has appeared in the picture I use the Rubber Stamp tool which allows you to copy a small area of the exiting picture and paint with it.

There are a number of suitabe paint grograms that have these simple tools including some that may have come with your digital camera and freeware ones.

An example of a freeware paint program is GIMP, which I assume stands for Graphic Image Manipulation Program. If you search the Internet you will find this easily. I have not tried it much as yet but it is like all things we need to learn, just give it a go and experiment.

Improving Your Modelling

By now you may have noticed that as the picture of the layout is static it can quickly show those areas that need work or that are lacking in suitable detail.

Unfortunately this can also mean that the wagon that we built some years back is now showing it's age, particularly against the recent influx of incredible models from China.

Improving your modelling is about studying your model pictures, learning from them and fixing those glaring and not so glaring bits.

Examples of potential modelling improvements that can become painfully obvious are as follows:


  • Incomplete models become very apparent;

  • no numbers on locomotives or carriages;

  • no point rodding and/or catchpoints and catchpoint indicators;

  • buildings not bedded into the scenery, that is show a crack under the building;

  • station corrugated iron water tanks without a tap (this one forced me to add a tap and downpipe to the water tank at the BYLONG station building - see the pic of 622 and 6037 in my first post versus the one below this post);

  • coarse detail;

  • overly bright painted backscene;

  • steam locomotives in particular having no crew;

  • a lack of ballasted track;

  • and of course many other similar issues.

If these issues are corrected then it becomes likely that your modelling will improve, until of course you take that next photograph... ;-)