
The reason for this is particularly related to the insulators and crossarms as the design of these makes the use of the stretchy thread easy.
I use Rix Products crossarms for two reasons, they have the V supports at approximately the correct place and the insulators are moulded proud of the crossarm supported by the mounting bolt. This gives a way to capture the stretchy thread under the insulator. The crossarms come with ten insulators per crossarm and 12 crossarms per sprue. Each crossarm on the sprue is connected to the base of the V above and in such a way that they can be cut from the sprue as 2, 3, 4, 6 or 12 crossarms. Different numbers of crossarms could be cut from the sprue but then they wouldn't be one piece, still possible though . I trim the ends of the crossarms to give me three insulators on each side and I cut two connected crossarms from the sprue at the bottom of the V support where it meets the next crossarm down. The reason for this is that from observation of photos, I determined that some sections of cross-country lines have two crossarms with six insulators, others of course have many more of each. I always subscribe to doing as little as is necessary to give the right impression so two crossarms of six insulators seemed good to me. The product number of the Rix Products crossarms is 628-31 and I bought mine from the Model Railroad Craftsman at Blacktown NSW.
I use code 70 weathered Micro Engineering rail for the posts. I use the code 70 as it is more robust than code 55 which would be more correct, however the code 70 still looks OK due to the dark weathering. As the prototype also used timber poles, I have used the Rix Products 30' and 40' timber poles (product number 628-30) on the Ardglen station of Ron Cunningham's Werris Creek layout (see this previous post for a photo).
Rix Products also has 40' poles available, product number 628-40. You can download the catalogue from this link. I also obtained the weathered code 70 Micro Engineering rail from the Model Railroad Craftsman (this is not meant to be an advertisement for MRRC, it is just one of several hobby shops that I frequent).
I paint the crossarms with Floquil concrete as it gives a good impression of the weathered wood. Of course given that Testor has decided to no longer make Floquil paint I will have to find something else.
I then paint the insulators white (I know that there are also clear and clear green glass insulators) using the method in the following video.
As can be seen in the video the trick is using the applicator nozzle from a tube of ACC Super Glue with a taper cut across the nozzle. I dip a brass rod in the acrylic white paint and allow a drop of paint to fall into the screw part of the nozzle. Now this paint won't want to run all the way to the hole in the nozzle so I then dip the brass rod with paint on it into some methylated spirits (de-natured alcohol) and then place the rod into the paint in the screw top of the nozzle. This thins the paint sufficiently to allow it to run to the nozzle but not enough so that it flows out. Now this sounds a bit complicated but it isn't really. The paint is then applied as per the method in the video.
I assemble the line poles in a jig that holds the crossarms in the correct position. The paint application nozzle can be seen in the photo as well.
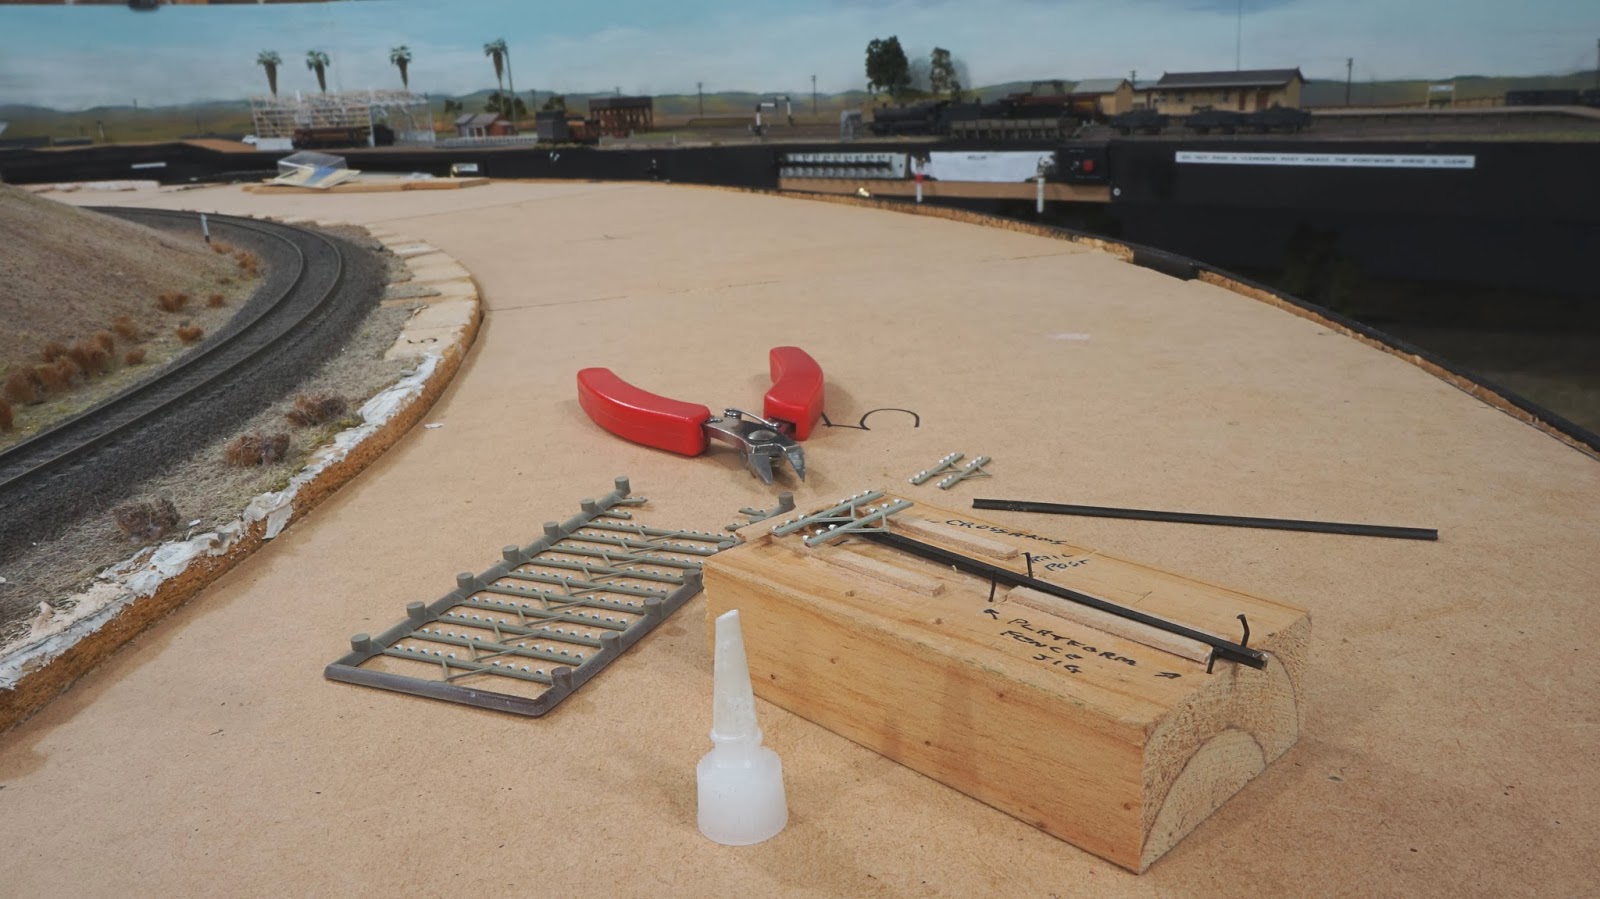
Careful observation of the above photo will show that I glue the crossarms to the base of the rail and not the side as per the plan in a previous post.
If you wish to do it more prototypically, you could cut small pieces of say 2" x 3" Evergreen plastic strip and glue the small block in the correct place against the web on the side of the rail so that the rail post and crossarm have the correct orientation.
If I was doing a small layout I might have considered this but I had too many to make so needed and easy way to produce the line poles.


No comments:
Post a Comment