
Way back in March of 2012 I did a post on where my Cassilis branch terminus was up to construction wise. Here is the relevant post.
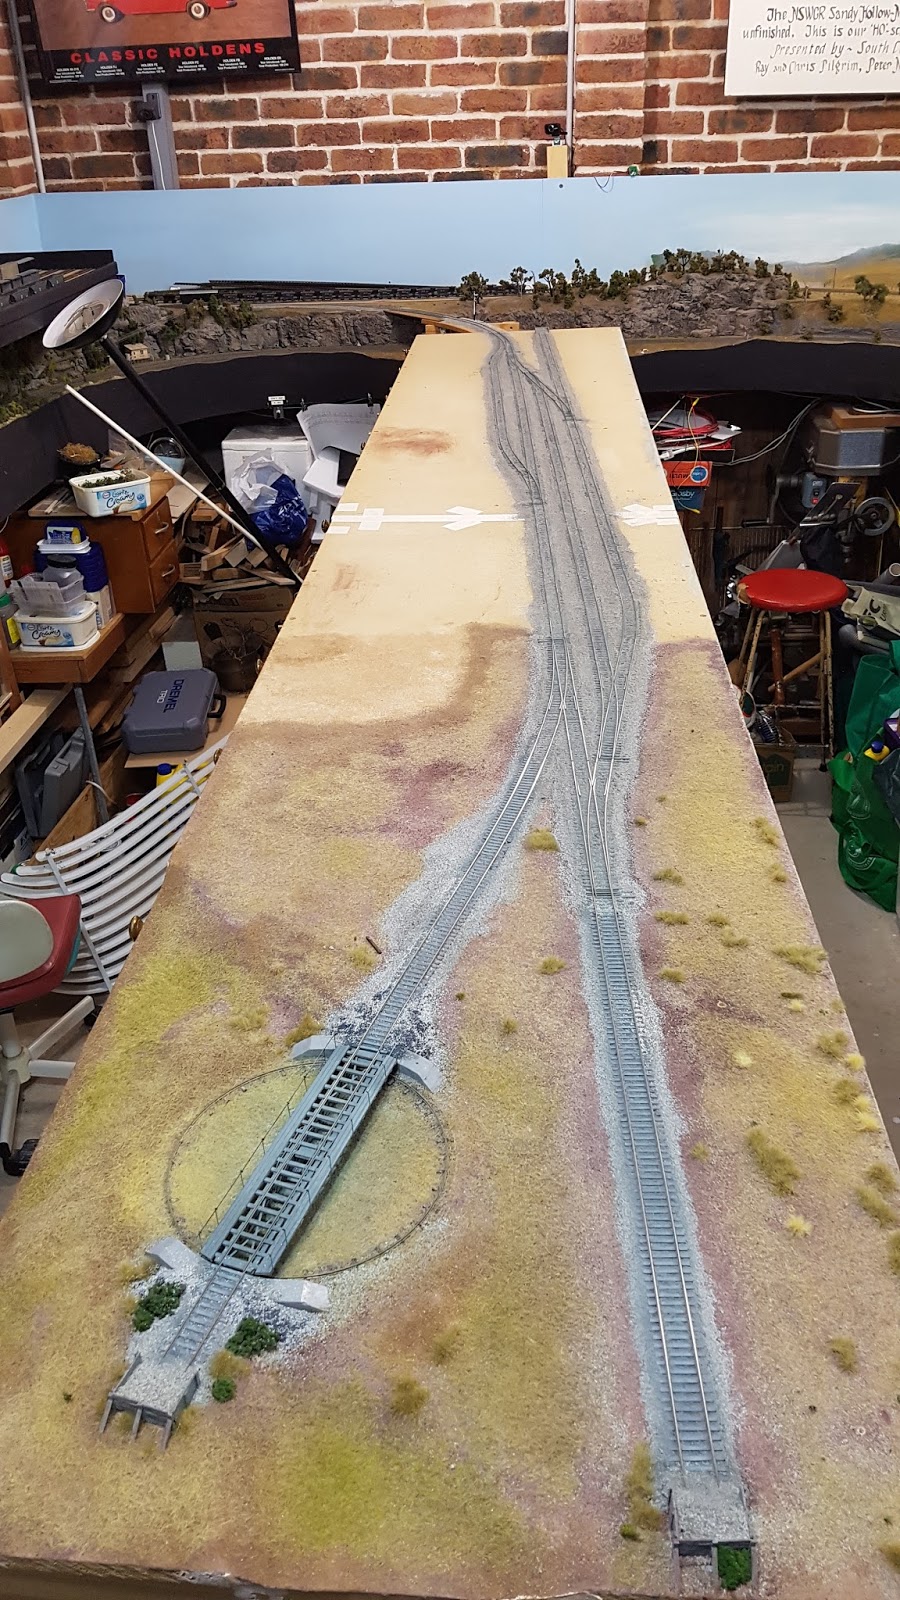
Well, I have started on Cassilis again, working on the track. The yard has been operating since 2012 but there were a couple of spots that occasionally would give trouble. The yard has scratch built points and I had aligned the rails, leaving a gap where it was required electrically for DCC. I used Micro-Engineering Code 70 flextrack and of course I had used track gauges when making the points. Now, I found out that the ME rail had a wider gauge than my pointwork, not by much but with nothing physically aligning the rails this was an issue.
I bought some ME insulated rail joiners and also some Peco code 70/75 insulated rail joiners to correct the issue. I had to use short lengths of the insulated fishplates so that I could lift the end on a point enough to get the fishplate on to the rail then drop the rail back down and slide the fishplate across the gap onto the other rail. I tried the ME fishplates first and could not get them onto the first rail as the slots for the rail were very fine, too hard, so I abandoned them. The Peco fishplates have a central small vertical tab meant to keep the rails apart but as I needed a short fishplate I cut through on each side of the tab to make two small fishplates. Although a little bit fiddly these worked much better. I proceeded to do as many of the gaps in the yard as I could. Several were aligned quite well, usually between my points, so they didn't need the insulators. There were also a couple of joins that I couldn't safely raise the rails on so they stayed the same.
I followed the fishplate installation by checking the vertical alignment on the rail gaps without the insulated fishplates. Several rail joints needed a bit of shimming with some 0.010" plasticard.
After this came a spray with some light grey acrylic paint over the sleepers and rails to visually tie the flextrack with the points and their PCB and timber sleepers. If you every spray your track with acrylic paint be sure to immediately clean the track with a track rubber as the paint will go off quickly and be hard to remove if left. No, I didn't get caught with this one.
The small section of the yard at the turntable end had some scenery and the track had been ballasted with Woodland Scenics Fine Ballast Gray Blend (B1393) to imitate loco ash ballast as often used on branch lines. So knowing that I had some I went searching through my scenery materials but, of course I had used it on the branch line running from the junction near Wollar and I had very little left, a trip to the hobby shop was needed.
Ballast obtained, I spent this afternoon applying and shaping the ballast using the method I posted about in March 2012. I use an edge painter 'brush' that I found at Bunnings as shown in the following photos, dragging it lightly along the track, sweeping the ballast off the sleepers, not hard to use.
Here it is firstly showing the underside bristles.
 |
| Ballasting at Wollar - March 2012 |
Now in an action stance, less the copper bar weight I used to keep it upright for the photo (I take time shots and can't keep my hand still enough).

When I did the Wollar ballasting (above) I used some liquid hairspray that my hairdresser daughter had spare and it worked well but did it smell!. This time I crossed my fingers that I wouldn't get any swelling of the baseboard where three tracks cross and used water based 'glue'. The two 1800mm Cassilis baseboards are joined in the middle of the yard so I taped over the join and also a number of screws that hold the boards in alignment. I wanted to be able to find these screws if I needed to separate the two boards in the future and having the screw heads full of plaster was not a good idea, so I took this photo.

The water based 'glue' I used was Long Life Self Shining Floor Polish which is really just a thin acrylic clear sealer, basically like a thin glue. I have used this for a number of years for glueing soil, ground covers and static grass. It can be found in Woolworths in 500ml yellow plastic bottles. or you can get 5 litres at Bunnings.
So here is where I am up to.
OK, now I have to confess. I started back on Cassilis as I wanted to try out my 3D printed fishplates!
Here are a couple of views of the 4 bolt versions in place.


Now 4 bolt fishplates are usually found on sidings but can be found occasionally on the branch main so I thought I would do that. The points have different plates that appear to be the 6 bolt variety so after a bit more research I will work my way down the yard.
Apparently NSWGR had two sizes of rail, 60ft for main line and 45ft for sidings. So that means that the 6 bolt fishplates should be spaced every 60ft of main line and the 4 bolt fishplates for sidings every 45ft. Each rail joint is offset nominally by half the rail length but I am sure that wandered around a bit based on the track layout and where the rails met a set of points which would have two fishplates opposite each other. The 60ft lengths of rail would have been interesting to shift on two flat cars, probably sitting on a 'turntable' affair at the centre of each flat car. Too hard to do on a model I suspect.
If the 3D printed fishplates are placed opposite each other I have checked and they don't foul the flanges on either Code 110 or Code 88 wheels.
OK, I just checked some photos I took recently in Oberon yard and the 'main line' seems to have 45ft rail and 4 bolt fishplates joining the points and the points themselves have 6 bolt which is to be expected. So perhaps, pioneer branch lines may only have 4 bolt fishplates and 45ft rail other than on the points. And I have a branch line approximately 36ft long and that isn't counting the yard!
Who made these fishplates and caused this problem anyway ....


3 comments:
An interesting post, Ray. I know what you mean about the baseboard swelling, it's the last thing you need with trackwork- with your characteristic skill and delicacy you have avoided it. I tend to be a bit ham-fisted with glues and the like! Interesting that you use an acrylic co-polymer product for ballast, a bit like the now defunct "Johnson's Kleer" in this country, many folk in the UK use it or a replacement. I did get caught out recently with the paint on the track...I wish I had read this first to remind me :-)
Iain
I had problems with thinned PVA on my Wollar station baseboard joins years ago which I finally stripped out the track relaid it and ballasted using the liquid hairspray to bond it. Apart form the smell the hairspray works very well but is not something that can easily be bought. It is used in a spritzer type spray bottle.
The Johnsons Kleer is equivalent to what I used as I understand it. Aircraft modellers use it to apply a clear high gloss coat on a model prior to decalling.
I find that the Long Life Floor polish acrylic holds the ballast reasonably well for normal use but it can be easily dug up and removed from the track if necessary without all the mucking about with soaking the track/ballast with water and the attendant risk of swelling of the baseboard.
It hold static grass quite well and it dries matt when used on ballast, soil, etc. very useful stuff.
Ray
Great information on different approaches once again, Ray. Thanks for passing it on!
Cheers,
Lindsay
Post a Comment