Saturday, April 23, 2011

An Impromptu Operating Session

As our normal night at Werris Creek clashed with Ron (Eureka Models) going to Hobson's Bay exhibition I had the rest of the Ramblers over to Bylong for a bit of a run.

Not an operating session as such with timetable and all but I did set up the Up and Down Pickups and the Cassilis Branch Mixed.

Gary Laker had the Down Pickup, Marcus Amman had the Up Pickup and Bob Lynch had the Cassilis Mixed. Now of course in the way of things they all managed to end up in Wollar shunting at the same time!

Towards the end of the chaos I realised that I should have taken some video so I grabbed my camera. By this time Bob Lynch had completed shunting the Cassilis Mixed and had put 3390 to bed in Wollar loco depot after dropping the ash, re-coaling and watering.

I managed to get a shot of a through goods driven by Layne Hardie and Marcus left Wollar and proceeded to Bylong in the early part of the video. This left Gary with the Down Pickup alone in Wollar and the rest of the video shows 4908 shunting and then leaving Wollar.

Everyone else ran trains with the usual interesting meets occasionally, there being no dispatcher.

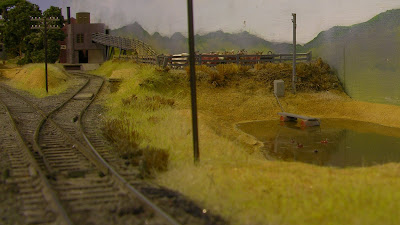
If you pay attention you will notice a new scene, more on this later.

Enjoy.

Tuesday, April 12, 2011

Just a little resistance

For decades (since the 1980's) I have been interested in the possibilities of some sort of computer based control of my trains. With the advent of DCC this has moved much closer in recent years.
My idea is to be able to drive a pickup goods while the computer sends trains along the main line from staging yard to staging yard. This of course is just for me to operate alone. Now, that is not to say that I want to always operate alone but it is more the challenge of doing it in the first place.
I am one of those people who like to try things out and am quite happy to build say one BWH wheat hopper but don't ask me to make the rest of the kits I have stashed away (thankyou Trainorama for rescuing me from that dilema).
A couple of weeks ago I found some SMD (Surface Mount Device) 5.1K ohm 1/8 watt resistors at the Model Railroad Craftsman at Blackown NSW. The brand was Ngineering and there were 20 for $2.50 in the pack. I bought the only two packs that Gary had and then the fun began.
What are the resistors for? They are used across wheels in a wagon to trigger a track detector (NCE BD20) so that a computer or other circuit can know that a train is in a block (or section).
Since Bylong is set in 1965 the wagon of choice is the guards van or passenger brake van, the locomotive is already capable of being detected due to the resistance of the motor, DCC dceoder or other circuitry.
If I was modelling the later no guards van period then I would have to consider adding a resistor to at least two axles on every wagon.
The idea is to connect the resistor between the two metal wheels on an axle. My first attempt at using the resistors involved coating the metal axle with super glue as the resistors have solderable contacts at each end but also on the top and bottom so insulation from the axle is the first priority.
Next the resistor is picked up with fine pointed tweezers and super glued to the now hardened glue. The last step is to use some solver conductive paint to make a connection from each metal wheel to each end of the resistor. I used a pointed toothpick to apply the paint and as can be seen from the picture below I ran the paint up the spokes to the rim to ensure good contact. I will of course spray paint the axles later.

Here is a photo of a Trainorama PHG with a couple of different ways to mount the resistors, on the left are the axles with the coating of super glue while on the right are two different size resistors mounted at an angle from the axle to the insulated bush on the other wheel, this is the easiest method but you need to watch out for the runny paint (see below). The small resistor comes from an alternate source but is extremely fiddly. The source was Altronics, an electronics supplier who had them in different sizes at 10 for 85c or $21 for a reel of 5000, I bought the reel figuring that some of the other Ramblers will want to do the same.
I checked each wheel set with a meter set to resistance. Easy enough? Not as simple as I found out. I kept ending up with short circuits as the silver paint ran around the resistor by capillary action and joined the other end (yes they are that small). Or, as I found out, the solvent in the silver paint was strong enough to eat into the super glue and get enough silver paint through to the axle. Now, the reason for this I think was that I was impatient and if the glue had been allowed to go off for say 24 hours then it probably would have been OK.
Why not use water based glue or paint so that this doesn't happen? Easy, water based glues and acrylic paints are of course going to be conductive until they are very dry, yes, I tried it also, same result, a short circuit.
Is it all too hard? No, I soon got the technique sorted and the success rate climbed but you can usually save the situation if it does happen by scraping away the silver paint and trying again.
I ran a series of tests on the layout while I was doing this, I tried one axle, no go, intermitent, two axles, yes if the wheels were spotless but intermittent even if not too dirty, so four axles which worked well.
The easiest axles to do were some Walthers Proto 2000 36" wheel sets that have plastic axles, dead simple.
Well, I have done 9 guards vans so far and have 18 guard vans and brake vans to do in total so I am going to have to get over my resistance to just completing one thing before moving on to something else (I still haven't finished the hand built points for the Cassilis branch terminus yard).
For those who are interested, I am using JMRI and Panel Pro on my computer which is interfaced with my NCE DCC system. I can see trains in the Bylong yard and on the main to either end and I also have a signal acting as a starter for the top staging yard that indicates if a train is in the block outside of the yard as it is about 24' long, that's all for the moment though.
Don't wait for the next installment it could be a while.

Monday, March 14, 2011

Main Western Line Video

A few weeks ago Chris and I visited John Brown, who is the builder extraordinaire of the Main Western Line layout that models the NSWGR Main Western from Tarana to Bathurst with the branch to Oberon.
I was invited up to take some pictures and video of this huge layout. I keep forgeting the exact dimensions but it is I think 70' x 33' in a room that is something like 80' x 45'. Apologies for the lack of metric dimensions but the old measure just seems to give a better idea of the size.
The layout is a U shape with two teardrops at each end of the U and the staging yard at the base.
I only managed to video two trains, one each way in the 4 hours that we were there.

Here is a short video of a western line goods passing through Locksley and then through the well known three arch road bridge.
Unfortunately, John was asked to build short backscenes so that the owner's wife could see out the large picture window at one end of the railway room (a hall really) and this makes shooting a video less than ideal. Still pictures can of course be edited to make the walls, windows, etc. disappear and while it is possible if the video camera doesn't move it is no where near as easy.
Chris and I drove via the road from Tarana that follows the railway which was very interesting, at one stage as we were leaving Tarana we crossed a bumpy bit of road with two cracks across the roadway and realised it was all that was left of the beginning of the Oberon branch, very sad.
The road is very narrow and I was glad that we didn't meet any cars coming the other way as I was too busy with one eye on the railway line.
At one stage we passed a large brick retaining wall that seemed strangely out of place at the time as the railway was out of site well above us.
We hope to visit again and with a bit of planning to get a better video view of the layout.

Monday, February 21, 2011

An Addition to the Roster?

On a recent Saturday morning I had to mind my 4 year old grandson and Chris suggested that I take him to Casula Hobbies for his first outing to a hobby shop.
OK I thought this could be fun.
We set off to Joe's shop at Liverpool with Cameron asking the odd question that showed he wasn't sure what the trip was about.
When we arrived, Joe in his usual friendly manner introduced himself to Cameron and I then introduced him to Therese, Laurie and Kerroby Bob. Well his eyes popped out as he made his way around the store, straight to the cars first; as he explained it to me a couple of months ago "You like trains and I like cars". Cameron is often with me in the train room and likes me to run the trains while he plays with the HO cars on the layout, I find them in all sorts of places later.
He then started asking a lot of questions about many of the things he saw in the shop as is the habit of 4 year olds.
At one stage Laurie showed him a chocolate and asked him what he wanted, his answer? "A train"!
Laurie was so stunned that he had to come and tell Joe and I about this 4 year old who turned down a chocolate for a train.
Well I was planning on buying him a small car for his collection and thought I might ask him if he would like a car later before we left.
I did and he took me to the Thomas range and pointed at James!
I thought OK but you need a carriage to go behind it, so I included a small 6 wheel green passenger car.
So now I present you with a video of Cameron having his first drive of his first locomotive. I should point out that this is the first time he has driven any train on Bylong or used an NCE Procab.
After about 10 minutes he was driving slowly with only a couple of promptings from me and stopping the train in the station and all, I was impressed at the concentration and care he took but then I am his grandad.
I should also let you know that James being in OO and not being an actual model of a real locomotive had a couple of clearance problems as it progressed around the layout. The cab roof hit a tunnel entrance which was removed (not yet glued in place) and then it hit the bottom of the secondary branch post on the bracket signal at the branch junction (it projects out over the track at the correct height). So it will be restricted in its running rights.
I had a look at it to see if I could lower the cab roof but it isn't really a candidate unfortunately.
I don't know if this interest will last but we will see.

Tuesday, February 1, 2011

A question about the 44 video

Iain S asked why the 44 seemed to jump away as it started to move in the first video of my last post.

The 44 is not mine and was one I had just finished installing the Tsunami decoder in and giving it a weathering job. I suspect the lurch was caused by paint on the wheels and then the power breaking through suddenly. I gave it a wheel spin in some CRC 2-26 later on when it stopped occasionally as it went around the layout which solved it. My44s do not have this issue.

Perhaps I should have redone the video after cleaning the wheels.

If you have a problem locomotive the Tsunami does allow adjustment of the BEMF CVs but this is best done using DecoderPro after you have saved the settings in your loco as the BEMF can get a bit confusing and needs to be adjusted carefully. Download the Tsunami technical documentation and manual, read it and well done if you can understand the BEMF instructions. A case of someone who knows what they are talking about not being able to come down to the level of most users when trying to explain things.

Monday, January 31, 2011

Now for a little noise and movement


4429 outside McCauleys Hide Merchants at BYLONG

I have been working for a while on trying to come up with a suitable set of parameters for DCC operation of diesels, to, as much as is possible within the constraints of the various decoder specific features and CVs, give us realistic operation.


I am reasonably close now and have decided to share my findings.

This video shows a Trainorama NSWGR 44 class (4429) fitted with a SoundTraxx Tsunami TSU-AT1000 Atlas form factor (board shape) Alco v12 251 sound decoder that has been adjusted to show the current state of my investigations. For those that are interested I retained the front Trainorama speaker but used an enclosure sold by Gary at the Model Railroad Craftsman at Blacktown NSW.

I use JMRI DecoderPro to adjust the CVs and have saved various set ups as templates to enable me to download them into a new diesel in seconds.

The NSWGR used to state the continuous tractive effort of each of their diesel classes the the maximum load and speed attained on a 1 in 40 grade.

Here is the data for the main NSWGR diesel classes:

Class    Maximum Load and Speed
40        400 tons at 15 mph
42        720 tons at 9 mph
421      630 tons at 11.25 mph
422      630 tons at 11.25 mph
43        510 tons at 12 mph
44        600 tons at 11.75 mph
442      600 tons at 11.75 mph
45        640 tons at 11 mph
47        490 tons at 8 mph
48        450 tons at 8 mph
49        470 tons at 7 mph

Note: mph is miles per hour for the young ones ;-)Now I know there are people out there who have driven diesels but I am trying to keep this relatively simple as the current state of decoder development doesn’t allow us to drive our models realistically.

A diesel achieves its maximum power when the diesel engine is in notch eight, the control of the engine having eight notches.

I initially set up one of my 44 class diesels to give 10mph in notch eight to replicate an average of the above conditions for a heavy goods load.

The Tsunami has two different ways of controlling notching:

It can be set up so that the engine notching noise can be changed separately to the speed of the locomotive (as in real life), the speed of the locomotive being controlled by the electric traction motors.

Or, it can be set up so that notching increases will occur at a set number of speed steps, e.g. every 10 steps, but the train can increase speed between these steps of course as it is the diesel engine notching up separately to the electric traction motors.

I initially tried the first method but quickly found that I would have the locomotive doing one thing while the engine sounds were doing another, mainly due to my distraction by other things happening on the layout.

As a result I chose the less realistic second method (the real drivers and purists will probably choose the first method).

Now I use the NCE DCC system and have standardised on the ProCab with its many options. One option is the use of buttons to control the locomotive speed and the ProCab has to sets of buttons, one set for small increments (1 step per press) and the another set for large increases and decreases (4 steps in 28 step mode and 10 steps in 128 step mode).

I use the 128 step mode and as such each press of the large buttons will notch up the diesel engine but will also display 10, 20, 30, etc. which tells you what notch you are in.

In combination with the notching I have set the maximum speed at 56 mph which can be reached by continuing past speed step 80 until speed step 126 (max. step on NCE) is reached.

Now we move to a really useful feature of most NCE cabs and that is that they have a momentum button that allows you to adjust the momentum of a train very easily. It is best to do this when it is stopped of course, like when you first couple up to your train. The momentum button will accept a number between 0 and 9, 0 being no momentum and 9 being the maximum.

A further aspect is the ability to use speed curves that can be programmed into a decoder and the Tsunami is set up with a special speed curve that I have devised.

The end result of all this is that you can start the diesel with a press on the small increment button and hear the diesel engine start to crank over and then fire. I then press down 1 speed step back to 0 to idle.

Next set the momentum for your train, I have been working on counting 2 - 3 bogie wagons in the train per increase in momentum number. I use a base of momentum 2 to represent the inertia on the diesel locomotive itself (light engine). The determination of the number of bogie wagons per momentum number is really a function of your layout, mainly its size and hence the length of the trains that you run.

Now, number boards on, headlight on as appropriate then hit the horn and start to notch up. If you have a momentum above 6 then you can notch up the engine to notch 8 if you wish and wait for the train to slowly move away as it takes the load.

One night when the Ramblers were at my place I had set up three locomotives one at 10mph notch 8, one at 15mph notch 8 and another at 20mph notch 8 and I asked them to drive each and we would decide on a suitable version. The decision wasn’t unanimous with most liking the 15mph and a couple the 20mph, it was decided that the 10mph was too slow at east for my size of layout (possibly good on a small layout for a slower run).

I have since driven at the 15mph notch 8 and feel that maybe the 20mph might be better, less realistic perhaps but more suited to a locomotive that is used on both goods and passenger trains.

The final bit of realism is supplied by the Tsunami decoder itself as it can actually brake a train. The decoder has a brake on Function 11 that will slow the train without reducing the throttle, just like the real thing. This braking effect is adjustable through a CV and needs to be set through trial and error after the above aspects are set up.

Function 11 on the NCE ProCab though is awkward to use so I re-mapped the brake to Function 7 where strangely enough there is a brake/wheel squeal noise, so now I can hit the brake and get the brakes squealing as the train pulls to a slow stop even with the throttle still on. Once the train is stopped I can release the brake and if the throttle is still open the train will slowly regain speed.

Another feature of the Tsunami is that by pressing Function 4 you can turn on dynamic braking when on a grade. The Tsunami can be set to drop the engine to either notch 1 or notch 4 while the dynamics are operating. As NSWGR diesels use notch 4 this is what I set it for.

Watch this video and listen right at the start for the engine to drop to notch 4 then the dynamics come in, you can of course combine this with actual braking, brake squeal and all.

So there you have it, not perfect yet but very driveable and great fun as well.


Monday, December 20, 2010

How's that for Prototypically Straight Track?

I am of course referring to my latest Desktop picture to the right.

I should apologise for my recent blog post where I led with a photo that I used on my last blog 5 weeks before!

Goes to show something, getting old? No don't answer that.

In the previous blog I also showed a picture of an overgrown siding and as can be seen by my desktop photo at right I have been a bit busy this weekend.
Here are a few more photos that I took to see how it was going, some areas still need some more work and clean up (grass laying all over the station parking area), etc.
Basically I have given the BYLONG station yard a going over scenically including the trees and I have finally finished the dam that supplies water for the livestock at the abbatoir, well nearly.


Lastly, I would like to wish you all a Merry Christmas and a Happy New Year and leave you with this 'Christmas card', my first attempt at adding smoke and steam.


Ray P